8.5 MODES
8. DIGITONE II CONTROLS > 8.5 MODES · PDF 第 24–29 · OS 1.12
There are several modes of operation on the Digitone II that decides what action the [TRIG] keys perform when pressed.
8.5.1 KEYBOARD MODE
Press [KEYBOARD] to enter KEYBOARD mode. In this mode, you can play the preset of the active audio track (or send MIDI notes if you have an active MIDI track). With KB SCALE set to CHROMATIC and MODE set to NORMAL the [TRIG] keys will light up in a pattern that resembles an octave of a piano keyboard layout. Only lit keys are playable. Press [TRK] + [TRIG 1–16] keys to select the track you want to play.
Press the lit trig keys to play different notes. The range from [TRIG 9] key to [TRIG 16] key is one octave. The whole note range you can trig is a little more than 10 octaves (C0–G10) You can transpose the keyboard 4 octaves up and 5 octaves down from the middle octave. Press [+]/[−] to transpose the virtual keyboard up or down in octave steps. With U/D KEY MODE set to KB OCT, you can also press [UP]/ [DOWN] to transpose the virtual keyboard when you are in KEYBOARD mode. For more information, please see “13.7.4 U/D KEY MODE” on page 79.
Notes triggered can be recorded on the sequencer in LIVE RECORDING mode. Find out how this is done in section “10.4 LIVE RECORDING MODE” on page 44.
Press [KEYBOARD] again to exit KEYBOARD mode.
In KEYBOARD mode the color of the [+]/[−] keys shows the current octave for the [TRIG] keys. White: 1 octave up/down, Yellow: 2 octaves up/down, Orange: 3 octaves up/down, Red: 4 octaves up/down, Dark Red: 5 octaves down.
8.5.2 KEYBOARD SETUP MENU
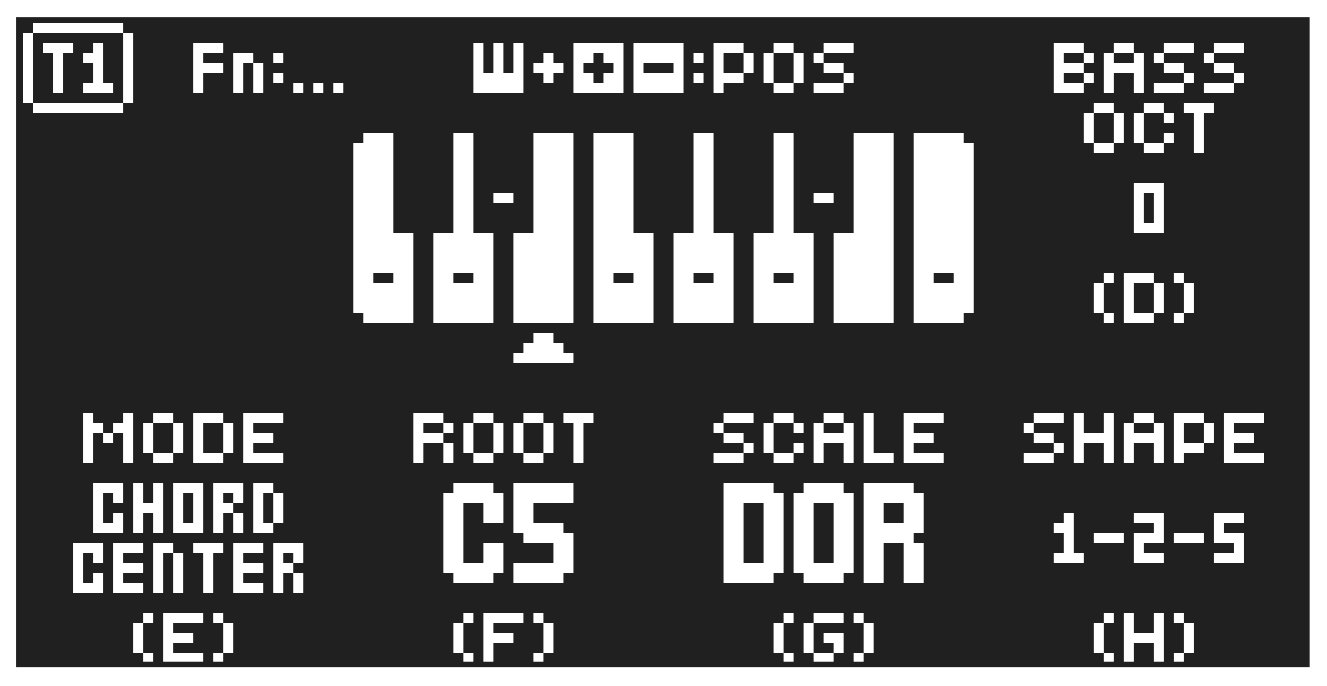
Press [FUNC] + [KEYBOARD] to open the KEYBOARD SETUP menu. Here you get a graphical view of which notes the [TRIG] keys play. These settings then affect how you add notes/chords using the [TRIG] keys to the sequencer in the LIVE RECORDING and STEP RECORDING modes and also in the NOTE EDIT menu. Press [+]/[−] or [UP]/[DOWN] to transpose the keyboard up or down an octave. In this menu, you can also set different musical scales, and select the root note of the scale and select chord mode. Use the DATA ENTRY knobs to change the settings. Press [NO] to exit the menu. Press [KEYBOARD] again to exit KEYBOARD mode. The settings are stored in the active pattern.
In the KEYBOARD SETUP menu, press and hold [FUNC] to open the CONFIG menu where you can select if the settings for the parameters MODE, ROOT, and SCALE should be set per pattern or per track.
MODE lets you select how the device handles note input from the [TRIG] keys.
NORMAL In this mode the the [TRIG] keys only play notes within the chosen scale. The [TRIG] keys will light up in a pattern that resembles an octave of a piano keyboard layout. Only lit keys are playable.
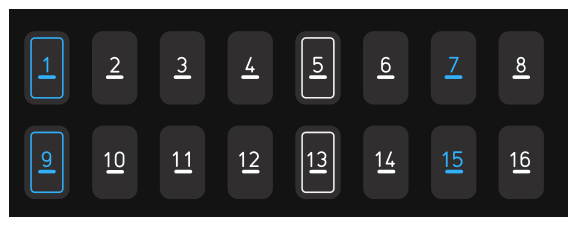
FOLDED This mode is similar to NORMAL, but changes the way the notes are laid out on the [TRIG] keys. Now all the [TRIG] keys trigger a note. The [TRIG 9] key plays the lowest note of the selected octave, root note and scale. The notes are then played upwards through the scale to [TRIG 16] and then further upwards on [TRIG 1–8]. When a scale contains less than eight notes in an octave, the “remaining” [TRIG] keys on the lower row will play the same notes as the first [TRIG] keys on the upper row. Blue [TRIG] keys signal that they contain notes that are one or more octaves distanced from each other.
In the following example of the whole tone scale [TRIG 15–16] keys play the same notes as the [TRIG 1–2] keys. [TRIG 1] and [TRIG 15] both plays a note that is one octave above [TRIG 9]. [TRIG 7] plays a note that is two octaves above [TRIG 9].
CHORD ROOT In this mode, a chord based on the SCALE and ROOT settings are played when you press a [TRIG] key. TYPE/SHAPE decides which type of chord is played. The chord stems from the the lowest root note.
CHORD CENTER works the same as CHORD ROOT with one added functionality, CENTER POSITION. This settings is indicated by a little arrow on the screen under the virtual keyboard. The center position determines what note the other notes should be centered around. This is similar to how a musician would play different chords, basically keeping the hand in the same position as much as possible while changing the chords. The center position can be changed by pressing and holding [KEYBOARD] and then pressing [+]/[−] to move it chromatically up and down. If you only press [+]/[−], the center position automatically moves to correspond to the next inversion of the chord, allowing quick up and down movements of the chord.
CHORD SPREAD works just like CHORD CENTER but in this mode every second note is transposed one octave up, resulting in a more spread out chord.
CHORD MEMORY This mode allows playing back up to 16 previously configured chords per pattern.
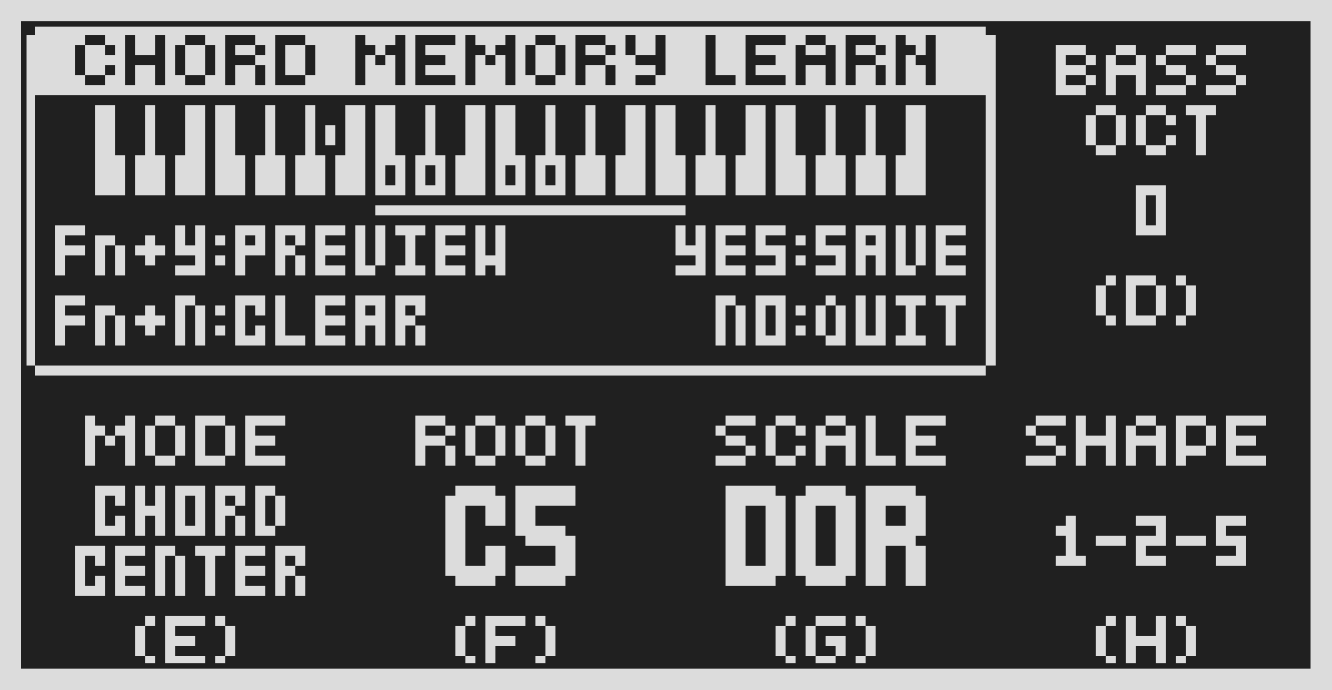
Use the CHORD MEMORY LEARN feature to add chords that later can be played back in the CHORD MEMORY mode. You can acces this learn functionality in any MODE.
- When in the KEYBOARD SETUP menu, press [FUNC] + [YES] to open the CHORD MEMORY LEARN feature.
- Press the [TRIG] key(s) (or an external MIDI controller) to play and record your chord. Press [FUNC] + [NO] if you wish to clear what you have recorded. Press [FUNC] + [YES] to preview the chord you recorded.
- Press [YES], and then use the [TRIG] keys to select a memory slot to save the chord to.
- Press [YES] to save the chord to the selected memory slot.
- Repeat this process if you want to record additional chords.
- Select CHORD MEMORY mode to play back the chords you recorded.
Copy, clear and paste commands are available in CHORD MEMORY mode.
ROOT sets the root note for the chosen scale.
SCALE sets the track’s scale. This setting governs which notes are playable on the Digitone II’s [TRIG] keys to allow only notes in the set scale. For a list of all selectable keyboard scales, please see ”APPENDIX E: KEYBOARD SCALES” on page 119.
TYPE/SHAPE With SCALE set to CHROMATIC you have here a selection of different types of chords (for example, MAJ, MIN, 7TH, MIN7, MAJ7, DIM) to choose from. With SCALE set to anything but CHROMATIC, diatonic chords in the scale are created, and TYPE/SHAPE sets which notes in the chord are used.
For example, with ROOT set to C and SCALE to ION (white notes only), and SHAPE set to 1-3-5:
Playing a C note, this will create the notes C, E, G (C major)
Playing a D note, this will create the notes D, F, A (D minor)
Playing a C note on 1-3-5-7 will create the notes C, E, G, B (C major 7th) etc You can also use [TRIG 1–8] to select shape which provides a quick access to the shapes and is useful when playing the [TRIG] keys live by hand.
- You can also use an external keyboard to play the active tracks preset chromatically.
Connect the keyboard to the Digitone II and configure the external keyboard and the Digitone II MIDI Auto Channel (SETTINGS > MIDI CONFIG > CHANNELS) to the same MIDI channel. Then play the keys on the external keyboard to play the active tracks preset chromatically. You can play the active track’s preset chromatically even if the Digitone II is not in KEYBOARD mode.
BASS OCT adds another root bass note 1, 2, or 3 octaves below the original root.
Setting it to -1 will create a note one octave below (playing a C3 with TYPE/SHAPE set to 1-3-5 will create the notes C2 C3 E3 G3). Setting it to -2 will create a note two octaves below.
If the chord has more than three notes, it will replace the root note for the bass note. So playing a C3 using SHAPE 1-3-5-7 and BASS OCT -1 will create the notes C2 E3 G3 B3 The BASS OCT parameter is only available if MODE is set to CHORD ROOT, CHORD CENTER, or CHORD SPREAD.
If MODE is set to any of the CHORD modes variants, the [TRIG] keys will not light up since a chord consists of several notes.
8.5.3 MUTE MODE
You can use MUTE mode to mute any of the 16 sequencer tracks. Unlike KEYBOARD mode, it makes no difference which track is active when you enter MUTE mode. All tracks are accessed simultaneously. Press any of the [TRIG] keys to mute the corresponding track. Press again to unmute. The color of the [TRIG] keys indicates it’s tracks mute status. Lit keys signify unmuted tracks. Unlit keys signify muted tracks.
There are two different versions of MUTE mode on the Digitone II:
- GLOBAL MUTE MODE In GLOBAL MUTE mode, the muted tracks are muted in all patterns. In this mode, the [TRACK] keys are lit green. If a track with trigs placed on it is muted in GLOBAL MUTE mode, its [TRACK] key blinks green when the pattern plays.
Press [FUNC] + [TRK] to enter GLOBAL MUTE mode.
Press [FUNC] + [TRK] to exit GLOBAL MUTE mode.
- PATTERN MUTE MODE In PATTERN MUTE mode, the muted tracks are muted only in the active pattern. In this mode, the [TRACK] keys are lit magenta. If a track with trigs placed on it is muted in PATTERN MUTE mode, its [TRACK] key blinks magenta when the pattern plays.
Press [FUNC] + double-press [TRK] to enter PATTERN MUTE mode.
Press [FUNC] + [TRK] to exit PATTERN MUTE mode.
The GLOBAL MUTE mode settings are saved together with the project. The PATTERN MUTE mode settings are saved together with the pattern.
If a track with trigs placed on it is muted in PATTERN MUTE and GLOBAL MUTE mode, its [TRACK] key blinks magenta in both modes when the pattern plays.
You can also prepare tracks for muting/unmuting before the mute action takes effect. While in any MUTE mode, press and hold [FUNC] and then press the [TRIG] keys corresponding with the tracks you want to mute/unmute. The selected tracks will then be muted/unmuted when you release [FUNC]. At the top of the screen you can see an overview of the mute status for all the tracks. Square = unmuted track, horizontal line = muted track, a plus sign = a track prepared to be unmuted, an X = track prepared to be muted.
- You can also use QUICK MUTE to mute and unmute sequencer tracks. Press and hold [FUNC] and then press the [TRACK] keys to mute or unmute tracks.
- Digitone II remembers the last used version of MUTE mode and will access this one first when you press [FUNC] + [TRK]. This also applies to QUICK MUTE.
8.5.4 TRIG MODE
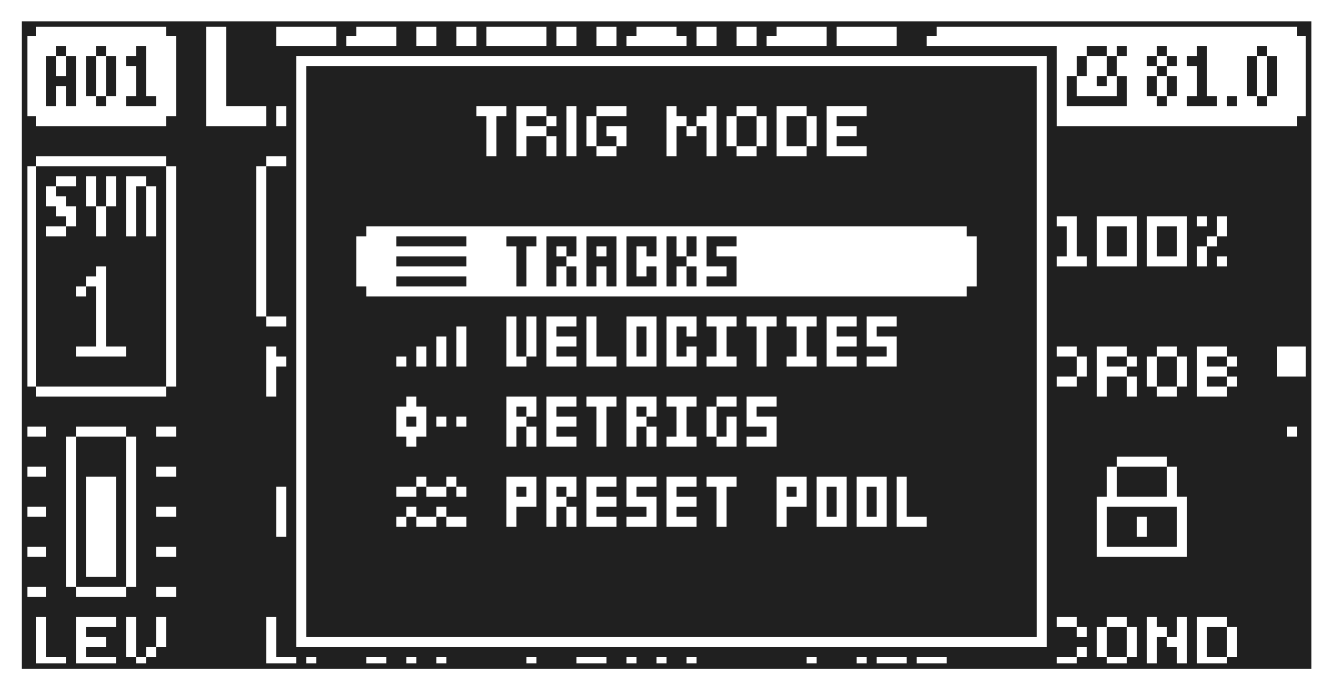
The various TRIG modes affect the functionality of the [TRIG 1–16] keys. Press [FUNC] + [UP] or [DOWN] to select which TRIG mode that should be active. The selected TRIG mode is active for all the tracks. All actions performed using the trig modes can be recorded in LIVE RECORDING mode.
TRACKS
This is the default TRIG mode. In this mode, the [TRIG 1–16] keys triggers the corresponding audio/ MIDI tracks.
VELOCITIES
In this TRIG mode, the [TRIG 1–16] keys triggers the active track with different amounts of velocity. Trig 1 = Velocity 8
Trig 2 = Velocity 16
Trig 3 = Velocity 24
Trig 4 = Velocity 32
Trig 5 = Velocity 40
Trig 6 = Velocity 48
Trig 7 = Velocity 56
Trig 8 = Velocity 64
Trig 9 = Velocity 72
Trig 10 = Velocity 80
Trig 11 = Velocity 88
Trig 12 = Velocity 96
Trig 13 = Velocity 104
Trig 14 = Velocity 112
Trig 15 = Velocity 120
Trig 16 = Velocity 127
RETRIGS
In this TRIG mode, the [TRIG 1–16] keys triggers the active track with different amounts retrig rates. Trig 1 = Retrig rate 1/1
Trig 2 = Retrig rate 1/2
Trig 3 = Retrig rate 1/3
Trig 4 = Retrig rate 1/4
Trig 5 = Retrig rate 1/5
Trig 6 = Retrig rate 1/6
Trig 7 = Retrig rate 1/8
Trig 8 = Retrig rate 1/12
Trig 9 = Retrig rate 1/16
Trig 10 = Retrig rate 1/20
Trig 11 = Retrig rate 1/24
Trig 12 = Retrig rate 1/32
Trig 13 = Retrig rate 1/40
Trig 14 = Retrig rate 1/48
Trig 15 = Retrig rate 1/64
Trig 16 = Retrig rate 1/80
PRESET POOL
In this TRIG mode, the [TRIG 1–16] keys triggers sixteen preset slots in the preset pool. The first page lets you trigger the presets in slots 1–16. Press [PAGE] to go to page 2 that lets you trigger the presets in slots 17–32. Keep pressing [PAGE] to go to the next 16 slots and so on. For more information, please see “9.1 THE +DRIVE LIBRARY AND THE POOL” on page 29.
The RETRIGS and PRESET POOL trig modes are only supported on audio tracks.