16.2 SAMPLING AUDIO USING THE RECORDER
16. SAMPLING > 16.2 SAMPLING AUDIO USING THE RECORDER · PDF 第 73 · OS 1.4.1
- If you use an external audio source, connect it to Tonverk.
- Press [SAMPLING] to enter the SAMPLING SELECT screen, and then use [UP]/[DOWN] to select RECORDER, and then press [YES]. If you have previously in the session used the Auto sampler, press [LEFT] to enter the SAMPLING SELECT screen.
- Use DATA ENTRY knob G to set SOURCE to your preferred audio input source.
- Keep an eye on the audio input meter and play the audio source, ensuring the volume is as strong as possible without clipping or distortion. The notches at the right end of the meter indicate 0 dB. Set MON to YES to monitor the incoming audio through Tonverk.
- Again, with an eye on the audio input meter, use DATA ENTRY knob F to set THR just above the indicated background noise of the audio source (when it is not playing).
- Use RLEN to set the sampling length.
- Press [YES] to arm the sampler and then play the sound source. When the incoming audio signal exceeds the set threshold level, sampling will start.
- Press [YES] when you want to stop sampling, or with an RLEN setting, the sampling will stop automatically. The sampling also stops if it reaches the maximum sampling time.
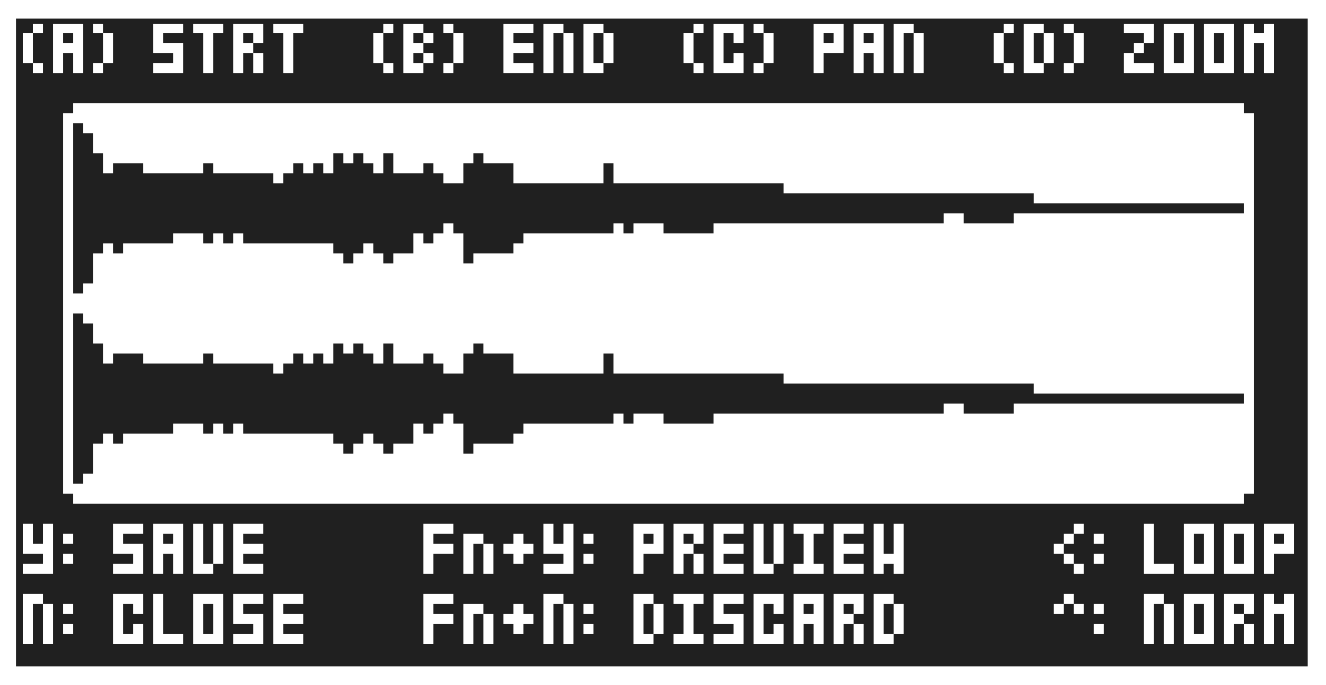
- Use the DATA ENTRY knobs A and B to set the parameters START and END to trim the sample to the desired length. You can use the DATA ENTRY knob D to zoom in and out making it easier to see where to trim the sample. Use C to pan left and right if the sample is zoomed in. Press [FUNC] + [YES] to preview the sample. (The preview is played back by the voice of the active track. Make sure to select track 1–8 as the active track). LOOP makes the previewed sample loop (when enabled). Press [LEFT] to toggle LOOP on/off. Press [UP] if you wish to normalize the sample to 0 dB.
- When you are happy with your settings, press [YES] to trim the sample. After you have trimmed the sample, you can press [NO] to untrim it if you are not satisfied with the result.
- On the NAMING page, name the sample and press [YES] again to confirm the save. The sample is saved on the Tonverk SD card in the folder USER/RECORDINGS
- Press [TRACK 1–8] if you want to select a track where you want to assign the sample. Press [NO] if you don’t want to assign the sample to a track.
Press [LEFT] to exit the Recorder.
You can only assign the sample to a track with a Single Player SRC machine selected. Only those tracks’ LEDS will light up and be selectable.